DJI Mic 2 frequently asked questions - FAQ
What devices can I use DJI Mic 2 with?
DJI You can use the Mic 2 with a variety of devices, including cameras, smartphones (via USB-C/Lightning port or direct Bluetooth connection), computers, Osmo Action 4 (via USB-C port or Bluetooth), Osmo Pocket 3 (via USB-C port or Bluetooth) and Osmo Mobile 6.
What are the differences between the sets DJI Mic 2?
The most professional option is DJI Mic 2 (2 transmitters + 1 receiver + charging case). Includes charging case, one Shadow Black receiver and two Shadow Black transmitters, suitable for audio recording for two people and providing extended battery life.
If you know that the microphone will be used by one person choose DJI Mic 2 Basic (1 transmitter + 1 receiver). Kit includes one Shadow Black receiver and one Shadow Black transmitter, suitable for audio recording for a single artist.
The last options were created for creators who only use a smartphone to record. Transmitters DJI Mic 2 (Pearl White) i DJI Mic 2 (Shadow Black) can be used with cell phones, Osmo Action 4 and Osmo Pocket 3.
Do I need to activate DJI Mic 2?
Not. DJI Mic 2 is ready to use without activation. You can scan the QR code on the package to register and get a one-year warranty extension.
How many recording modes does DJI Mic 2 offer??
"DJI Mic 2 offers three recording modes: S (Stereo), M (Mono) and Ms (Mono Safety Track).
S: Stereo mode. Audio from two transmitters is recorded using separate channels.
M: Mono mode. In mono mode, audio recorded by two transmitters is put into one channel.
Ms: Mono mode with backup security footprint. Backup audio trace is recorded at -6 dB if the main trace is distorted due to a sudden increase in the volume of the sound source.
If you are using Ms (Mono Safety Track) mode, you will need to separate the audio tracks during post-production.
What features the DJI Mic 2 charger case offers?
Charger case DJI Mic 2 can be used to connect transmitters to receiver and to store transmitters, receiver and cell phone adapters (USB-C and Lightning). It can also charge two transmitters and one receiver twice.
Are USB-C and Lightning DJI Mic 2 adapters interchangeable with DJI Mic and DJI Pocket 2 cell phone adapters?
Not.
Are the DJI Mic 2 transmitters and receiver compatible with the DJI Mic transmitters and/or receiver?
Not.
What is the maximum transmission distance between transmitters and receiver DJI Mic 2?
The maximum transmission distance is 250m according to FCC standards (USA) and 160m according to CE standards (Europe) (in an environment without obstacles and interference), so Poland's range is 160m.
How long does it take to fully charge the transmitters and receiver using the charging case DJI Mic 2?
At room temperature, it takes about 1 hour and 10 minutes to fully charge the transmitters and receiver using the charging case. We recommend using a 5V/2A charger.
How long does it take to fully charge the charging case?
It takes about 2 hours and 40 minutes to fully charge the charging case. As with the transmitter and receiver from thealecation use a 5V/2A charger.
What are the upgrades in the DJI Mic 2 model compared to the DJI Mic model?
DJI Mic 2 a little smaller and more lightweight. Noise cancellation, Bluetooth connectivity and the ability to play sound through the phone while the transmitter is connected have been introduced. For a full comparison, see our article.
What is the magnetic force of the clip magnet DJI Mic 2?
It amounts to 33 N. DJI Mic 2 uses multipole magnetization and has enough force to lift a block of iron weighing up to 3.3 kg.
Can DJI Mic 2 clip magnet affect my bank cards?
We recommend keeping the clip magnet DJI Mic 2 away from bank cards, pacemakers, RAM chips and hard drives.
What to look out for when using the clip magnet DJI Mic 2?
- DO NOT use when wearing heavy clothes (sweaters, down jackets, etc.).). Transmitters may fall due to lack of magnetism.
- Use with caution during intense exertion, such as jumping or sprinting.
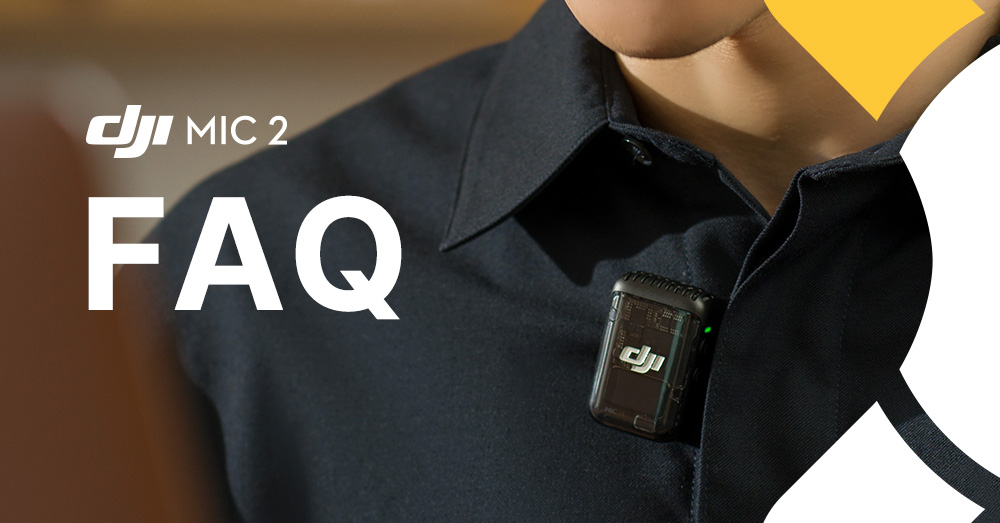
Where best to place the transmitter DJI Mic 2?
We recommend using the rear bracket of the transmitter DJI Mic 2 to fix it on the collar, for example. You can also mount the transmitter with a clip magnet DJI Mic 2. Try to keep the microphone opening facing the speaker's mouth. Keep a distance from the sound source min. 10-15 cm.
DJI Mic 2 - what kind of microphone is it, directional or omnidirectional?
The DJI Mic 2 transmitters receive audio signals in an omnidirectional, omnidirectional manner.
How many modes of operation are supported by DJI Mic 2 transmitters?
1. Transmitters that connect to the receiver using the 2.4 GHz frequency band.
2. Bluetooth mode.
Does the Mic 2 support live audio recording while connected to a phone via Bluetooth?
It depends on the compatibility of the live streaming app and the cell phone operating system. You can test this with headphones or a Bluetooth headset. If you can't record audio with headphones or a headset during live streaming, it means the transmitter doesn't support this function when connecting to a cell phone via Bluetooth.
How to connect Mic 2 to your phone via Bluetooth?
Connecting the DJI Mic 2 transmitter to a Bluetooth deviceThe transmitter can be connected to DJI Osmo Pocket 3, cell phones and otherdevices via Bluetooth. When connecting the transmitter to the phonecellular steps are as follows:
1. Turn on power to the receiver - transmitter LED system status light flashes green. Press and hold the record button of the transmitter for three seconds to enable Bluetooth pairing mode. The LED light will then slowly flash blue.
2. To start searching for nearby Bluetooth devices, press and hold fortwo second merge button on the transmitter. The transmitter's system status LED light will beflashed rapidly in blue.
3. Turn on Bluetooth on your mobile device and select DJI-MIC2-XXXXXX from the searched Bluetooth devices to connect to.
4. When the transmitter is successfully paired with a mobile device via Bluetooth, the system status LED light will be constantly lit in blue.

What third-party app to record with Mic 2 via Bluetooth?
In order to record video via Bluetooth connection to the transmitter, an external application is required for video recording or video calls, teleconferencing or live streaming. A list of such applications is available under this link. We use Protake for iPhone because it is free.
Why the Mic 2 when connected via Bluetooth does not record on the phone's built-in camera?
Mic 2 does not record to the internal camera, because phones use the phone's built-in microphone to record by default, and there is no setting to change this. There may be applications that allow you to change the audio input signal sent via Bluetooth, but we unfortunately did not find one.
Note that when connected to a smartphone via Bluetooth, the functions of independent recording and transmitter noise reduction are not available.Transmitter's USB-C port allows connection to headphones that support digital signals to listen to audio from a cell phone.
To record directly into the phone's camera and active noise cancellation, a receiver available in the kit is required DJI Mic 2 Basic.
How much internal storage space in transmitters DJI Mic 2?
The DJI Mic 2 transmitters each have 8GB of built-in storage space, which allows them to record audio in 24-bit quality for up to 14 hours or audio in 32-bit quality for up to 11 hours.
Do Mic 2 transmitters support external SD cards for data storage?
Transmitters do not support external SD cards for data storage.
What is the format of the audio files recorded internally by the transmitter DJI Mic 2?
During internal recording, a file is saved every 30 minutes. When 32-bit float recording is enabled, the file is recorded every 23 minutes, and the files are in WAV format.
How to export sound files from a transmitter?
Recorded files can be exported by connecting the transmitter to a computer using the included USB cable.
How to delete audio files from DJI Mic 2 transmitter?
To delete files, connect the transmitter(s) to your computer and delete the files you want to delete. You can also format the transmitters with the receiver. When the memory space of DJI Mic 2 transmitters runs out, recording will stop.
What devices the DJI Mic 2 transmitter can connect to via Bluetooth?
Transmitter DJI Mic 2 currently supports Bluetooth connection to Osmo Action 4, Osmo Pocket 3 and smartphones. Osmo Action 4 and smartphones can be connected to one transmitter via Bluetooth at a time, while Osmo Pocket 3 can be connected to two transmitters via Bluetooth simultaneously. When the DJI Mic 2 transmitter is connected to a smartphone via Bluetooth, smart noise cancellation and internal recording cannot be used.
How many transmitters can the receiver connect DJI Mic 2?
The DJI Mic 2 receiver can be connected simultaneously to up to two DJI Mic 2 transmitters.
Can the DJI Mic 2 receiver transmit audio data to devices with XLR ports?
No, the DJI Mic 2 receiver cannot transmit audio data to devices with XLR ports.
How to monitor audio while recording with DJI Mic 2 and if you can adjust the monitoring volume?
To monitor audio with DJI Mic 2, connect the DJI Mic 2 receiver and transmitters and connect headphones or a headset with a 3.5 mm plug to the black monitoring port of the DJI Mic 2 receiver. You can adjust the monitoring volume while monitoring by swiping down the main screen of the receiver DJI Mic 2, going to Receiver Settings, swiping left and touching the monitoring volume icon to make adjustments.
How to lock the receiver screen DJI Mic 2?
Yes, you can lock the screen of the receiver DJI Mic 2 by pressing the power button once. The screen will show the message "Locked screen." To unlock the screen and enable touch operation, simply press the power button again. While navigating through submenus, you can also return to the main interface by pressing the power button once.
When the DJI Mic 2 receiver is connected to a cell phone, can I play the recorded audio on the phone?
Yes, you can play recorded audio on your cell phone without removing the receiver.
Can DJI Mic 2 simultaneously charge both the cell phone and the receiver?
Yes. When the DJI Mic 2 receiver is connected to your phone using a phone adapter, you can use a charging cable to charge both your cell phone and the receiver simultaneously through the receiver's USB-C port.
Is Stereo mode supported when DJI Mic 2 is connected to an iPhone using the Lightning adapter for the phone?
Yes.
DJI Mic 2 outputs digital or analog signals?
Receiver OUT output DJI Mic 2 outputs analog signals for camera connection. Adapters for cell phones DJI Mic 2 (USB-C and Lightning) and USB-C ports output digital signals.
How to sync DJI Mic 2 with your camera?
There is a function that allows automatic switching on and off in sync with the camera. When the DJI Mic 2 receiver is connected to the camera via a 3.5mm TRS cable, this function can be enabled and the receiver automatically turns on and off in sync with the camera. When the camera is turned off or sound recording is not enabled during filming, the receiver automatically turns off. When the camera is on, the receiver automatically turns on.
To enable this feature, swipe down on the main screen of the receiver DJI Mic 2, go to Receiver Settings, swipe left, tap Enable/Disable with camera at the same time and select ON.
How to use the features of the recommended camera amplifier?
Swipe down on the main receiver screen to find Receiver Settings, then swipe left to find Recommended Camera Settings. Select the make and model of the camera, and adjust the camera amplifier to the recommended level. For more details, check out the Recommended Gain Level Instructions for Camera Setup. Connect the receiver to the camera's microphone port using a 3.5mm TRS cable, and the receiver's screen will show the current camera model in the upper left corner. If your camera is not in the list of recommended settings, select None for the camera brand and adjust the receiver gain level based on audio monitoring.
What features the DJI Lavalier microphone offers?
Unique rotating design allows flexible recording, and cable routing design prevents accidental disconnection. It is compact and easily concealable, making it ideal for interviews, vlogs, live broadcasts and other applications.
Is the DJI Lavalier microphone compatible with the DJI Mic model?
Yes.
How to update transmitter and receiver software DJI Mic 2?
"To update the software of the DJI Mic 2 transmitters and receiver, follow these steps:
1. Download the software update package from the download page of DJI Mic 2.
2. Make sure the receiver is off and the transmitter is on. Connect the transmitter or receiver to your computer using a standard USB-C cable.
3. Place the downloaded software update package (file with extension .bin) in the main directory of the transmitter and receiver.
4. Disconnect the transmitter and receiver from the computer, and they will be updated automatically. 1. If the update fails, download the software again and copy it to the transmitters and receiver, then reset the transmitters and receiver. Repeat the activity until the software is successfully updated.
2. Remove cell phone adapter from receiver before connecting receiver to computer for software update."
How to connect DJI Mic 2 transmitters to a receiver? "Transmitters and receiver are already connected by default. However, if it is necessary to reconnect, you can do it as follows:
Method 1: Place the transmitters and receiver in the charging case, and they will automatically connect.
Method 2: Turn on the transmitters and receiver, slide down the receiver's main screen, select ""Receiver Settings"", and then slide to the left to select ""Connect Device"". Press and hold the link button on one of the transmitters, then follow the on-screen instructions to complete the linking process. When the status indicator on the transmitter flashes green quickly, it means that the connection process is in progress. When the status indicator flashes green slowly, it means that the transmitter has already been connected and is waiting to connect to the next transmitter. When the status indicator becomes solid green, the connection is complete. To end the merging process while it is in progress, tap ""Stop merging""."